VPC Foundation
Created Lab VPC (10.0.0.0/16) with the wizard, which automatically provisioned subnets, route tables, an Internet Gateway, and a NAT Gateway in a single Availability Zone.
This lab covers the full process of building a VPC from scratch, configuring subnets and route tables, creating a security group, and launching an EC2 instance with a User Data script to automatically deploy an Apache web server.
Built a complete VPC architecture using the "VPC and more" wizard, then manually added additional subnets, configured a Security Group for HTTP access, and launched an EC2 web server. The original User Data script failed due to an AMI mismatch, which was resolved by adapting the script for Amazon Linux 2023.
Created Lab VPC (10.0.0.0/16) with the wizard, which automatically provisioned subnets, route tables, an Internet Gateway, and a NAT Gateway in a single Availability Zone.
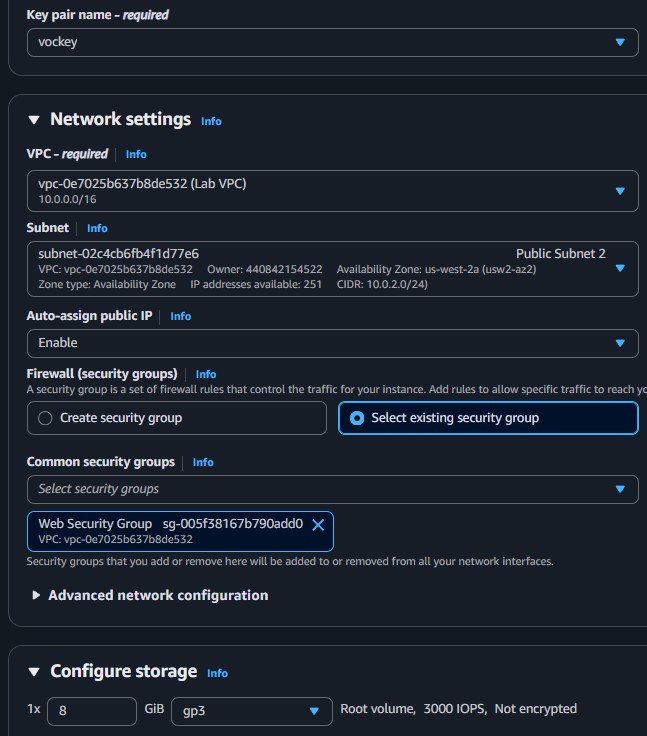
Added Public Subnet 2 and Private Subnet 2 manually. Associated them with the correct route tables. Created Web Security Group allowing inbound HTTP from anywhere.
Launched an EC2 instance with User Data automation. The initial script failed due to an AMI version mismatch. After diagnosing via instance logs, a corrected script was applied successfully.
Documentation of the VPC construction process and the troubleshooting required to get the web server running.
10.0.0.0/16, 1 Availability Zone,
1 public subnet, 1 private subnet, NAT Gateway in 1 AZ.
10.0.2.0/24) with Availability Zone set
to No preference.10.0.3.0/24) with Availability Zone set
to No preference.0.0.0.0/0 traffic to the Internet Gateway.
The instance log showed that the yum install -y httpd mysql php command failed because
the AMI provided was Amazon Linux 2023, not Amazon Linux 2 as the
guide assumed.
mysql package does not exist in Amazon Linux 2023 repositories.httpd, mysql, php) were on
a single yum install line, the failure of mysql caused httpd
to not install either.httpd, the directory /var/www/html/ was never created.unzip command failed because the target directory did not exist.#!/bin/bash
yum install -y httpd mysql php
wget https://aws-tc-[...]/lab-app.zip
unzip lab-app.zip -d /var/www/html/
chkconfig httpd on
service httpd start#!/bin/bash
dnf install -y httpd
dnf install -y php
wget https://aws-tc-[...]/lab-app.zip
unzip lab-app.zip -d /var/www/html/
systemctl enable httpd
systemctl start httpdyum with dnf (the default
package manager on AL2023), removed the mysql dependency (not needed for the lab app),
installed packages on separate lines to prevent cascading failures, and used systemctl
instead of chkconfig/service.
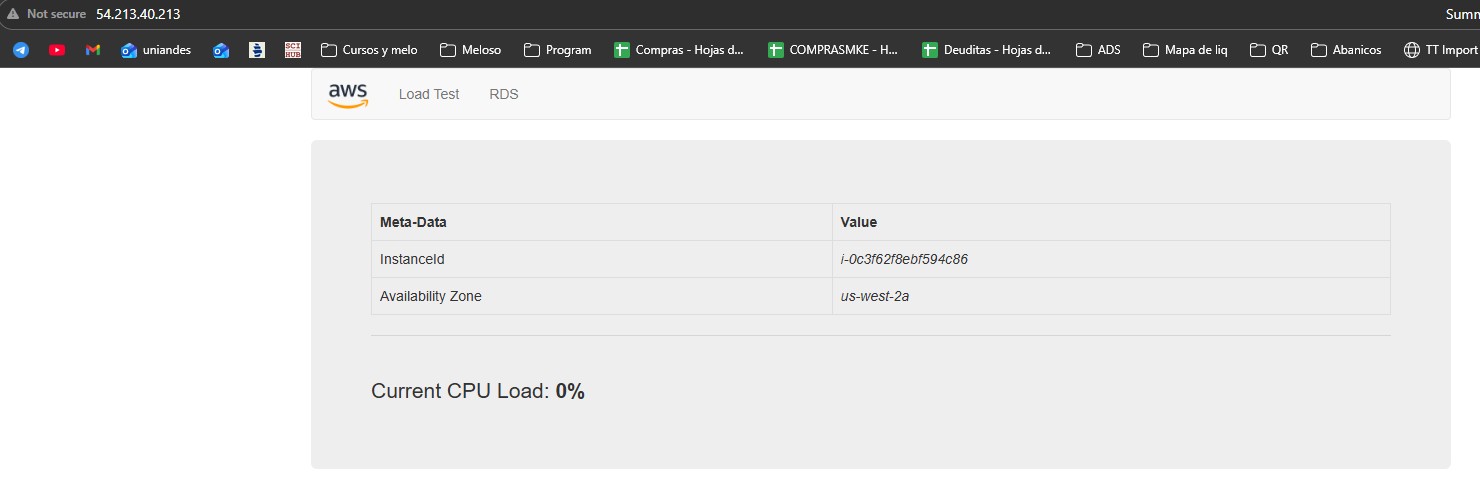
A new instance was launched with the corrected script. After reviewing the instance log and confirming all commands executed successfully, the web application loaded correctly via the Public IPv4 address.
dnf instead of yum and systemctl instead of service.
Always verify which AMI the lab environment provides.