AWS re/Start Lab · Networking

Create VPC Resources to Enable Internet Connectivity

This lab builds a complete VPC networking stack from scratch. Starting with a pre-existing VPC that has no internet access, each component (Internet Gateway, Route Table, NACL, Security Group) is manually configured to achieve full connectivity.

Lab Summary

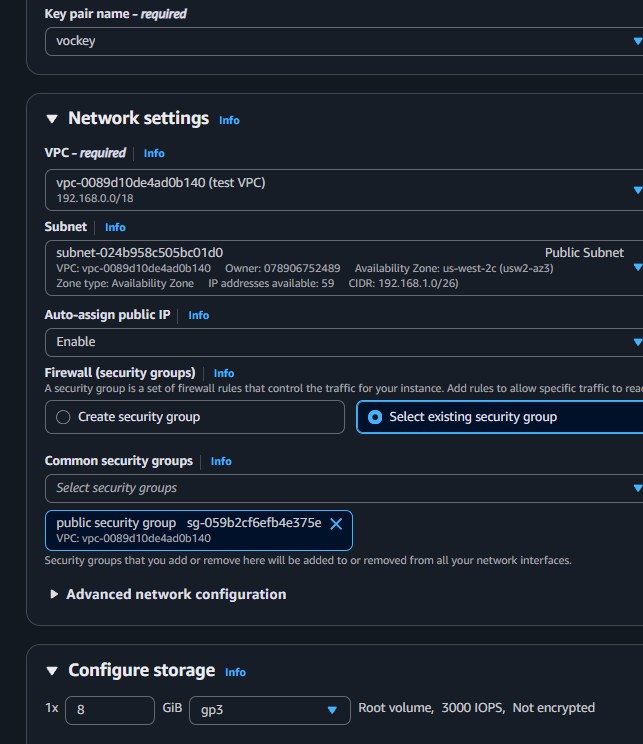
Started with a pre-built test VPC (192.168.0.0/18) that had no internet access. Manually configured each networking component: created an Internet Gateway, a custom Route Table, modified NACLs, created a Security Group, and launched an EC2 instance. Verified connectivity by pinging google.com from the instance.

Starting State

The VPC existed with 4 default subnets but no IGW, no custom routes, and default NACLs. No internet connectivity was possible.

Infrastructure Built

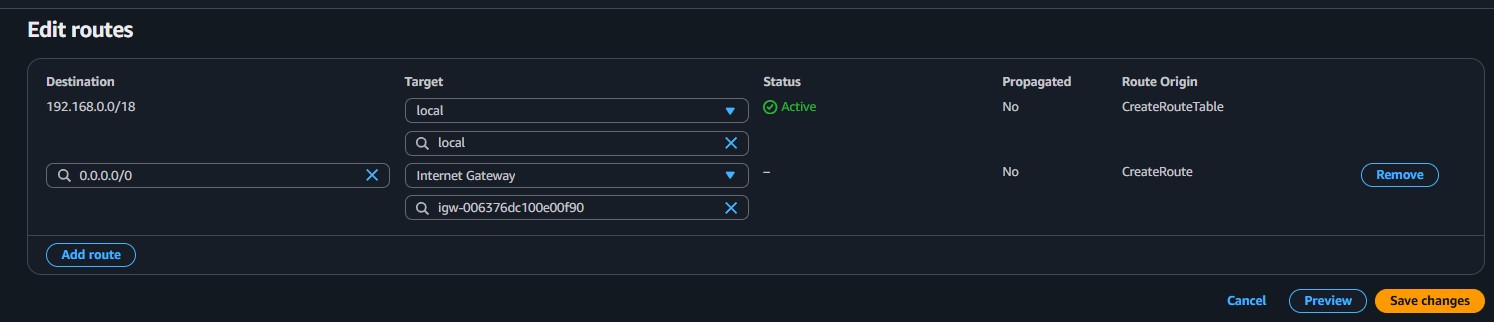
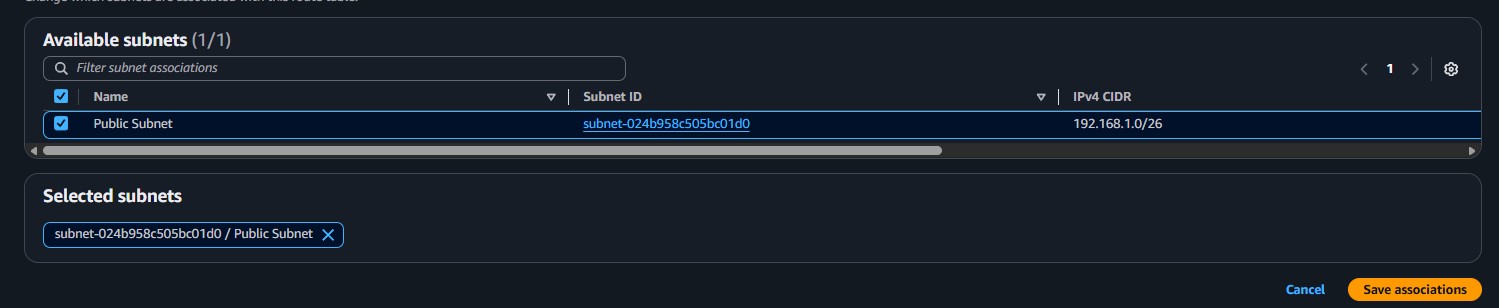
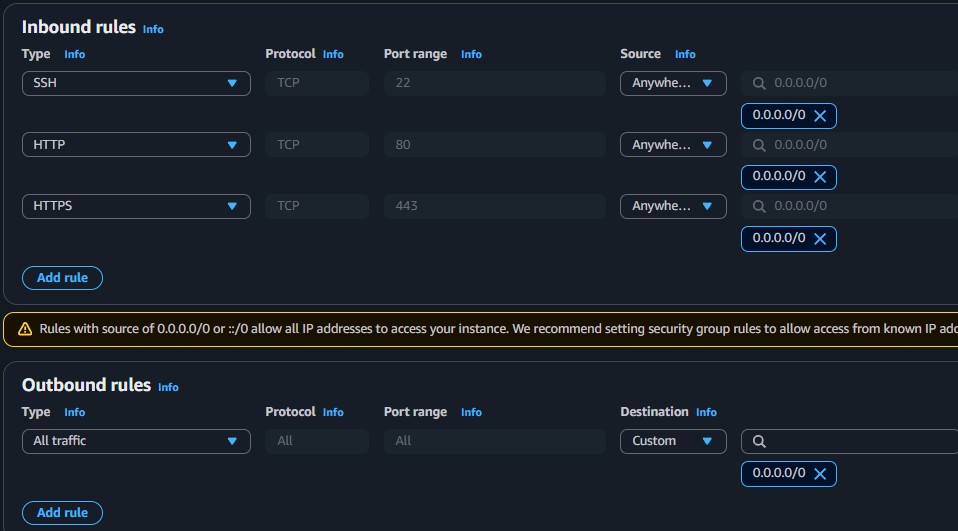
Created: Internet Gateway, public route table with 0.0.0.0/0 route to IGW, custom NACL allowing all traffic, and a security group for SSH/HTTP/HTTPS.

Final Verification

Launched an EC2 instance in the public subnet, connected via SSH, and successfully pinged google.com to confirm internet connectivity.

AWS Services Used

Amazon VPC

Pre-existing VPC with CIDR 192.168.0.0/18 and 4 default subnets. Served as the foundation for the complete networking build.

Internet Gateway

Gateway component that connects the VPC to the public internet. Created and attached manually to the test VPC.

Amazon EC2

Launched a t3.micro instance in the configured public subnet to test the end-to-end connectivity.

Step-by-Step Walkthrough

Detailed documentation of each networking component configured to achieve internet connectivity.

01

Explore the pre-existing VPC

  • Navigated to VPC > Your VPCs in the AWS console. Found the test VPC with CIDR 192.168.0.0/18.
  • Verified it is not the default VPC (Default VPC = No).
  • Opened the Subnets page. Found 4 subnets with CIDRs: 172.31.0.0/20, 172.31.16.0/20, 172.31.48.0/20, and 172.31.32.0/20. These are default VPC subnets.
Q: Is the test VPC the default VPC? No. The test VPC was created separately. The Default VPC field shows "No". This is important because the default VPC comes with pre-configured resources (IGW, subnets, route tables), while a manually created VPC requires each component to be set up individually.
02

Create and attach an Internet Gateway

  • Navigated to VPC > Internet gateways and selected Create internet gateway.
  • Named it Internet Gateway (IGW) and created it.
  • Selected the newly created IGW, then Actions > Attach to VPC.
  • Chose test VPC and attached. The state changed to Attached.
An Internet Gateway by itself does not enable connectivity. It needs to be referenced in a route table so that outbound traffic (0.0.0.0/0) is directed to it.
03

Create a public route table and configure routes

  • Navigated to VPC > Route tables and selected Create route table.
  • Named it public route table and associated it with test VPC.
  • Selected the new route table, went to the Routes tab, and selected Edit routes.
  • Added a route: Destination 
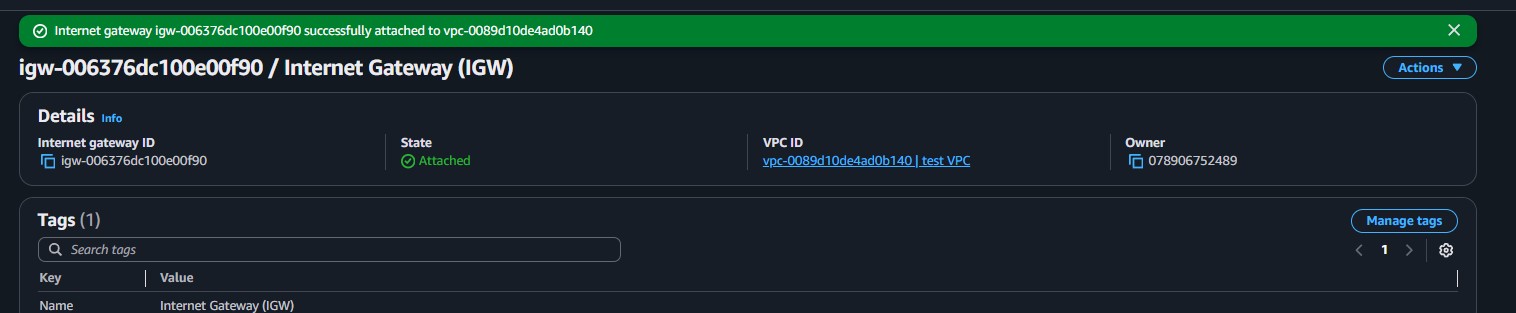
0.0.0.0/0, Target Internet Gateway (igw-006376dc100e00f90).
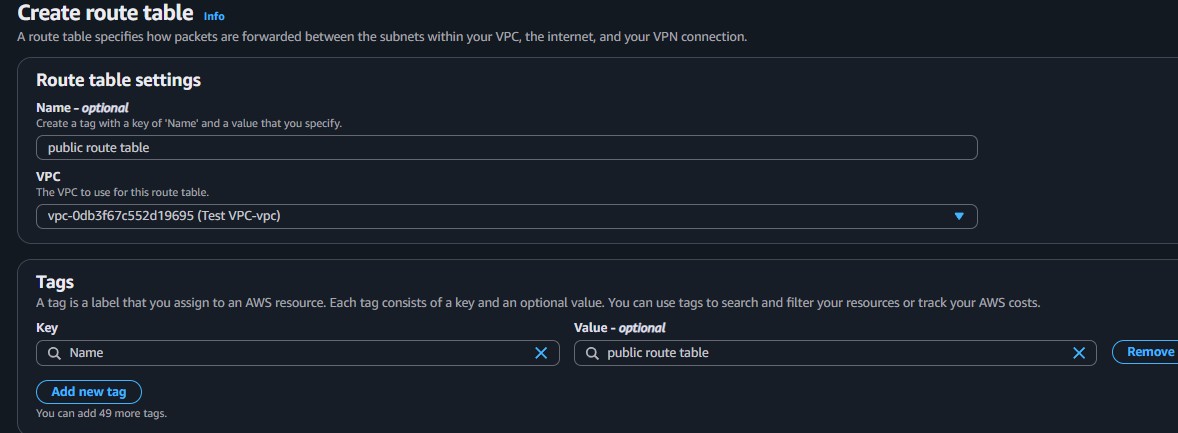
  • Saved changes. The route table now has two entries: the local route (192.168.0.0/18) and the internet route (0.0.0.0/0 via IGW).
Q: Why is the 0.0.0.0/0 route necessary? The route 0.0.0.0/0 is the "default route", meaning any traffic destined for an address not in the VPC's own CIDR will be directed to the Internet Gateway. Without it, the VPC has no path to the internet.
04

Associate the public subnet with the route table

  • With the public route table selected, went to the Subnet associations tab.
  • Selected Edit subnet associations and chose the Public Subnet (192.168.1.0/26).
  • Saved the association. The subnet is now explicitly linked to the public route table.
A subnet that is not explicitly associated with a route table uses the VPC's main route table by default. To make it a public subnet, it must be associated with a route table that has a route to the Internet Gateway.
05

Configure a Network ACL

  • Navigated to VPC > Network ACLs and created a new NACL named public NACL for test VPC.
  • Configured Inbound Rules: Rule 100, All traffic, from 0.0.0.0/0, Allow.
  • Configured Outbound Rules: Rule 100, All traffic, to 0.0.0.0/0, Allow.
  • Associated the public NACL with the Public Subnet.

Network ACL (NACL)

  • Operates at the subnet level
  • Stateless: return traffic must be explicitly allowed
  • Rules are evaluated in numbered order
  • Supports both Allow and Deny rules
  • Applies to all instances in the subnet

Security Group (SG)

  • Operates at the instance level
  • Stateful: return traffic is automatically allowed
  • All rules are evaluated together
  • Only supports Allow rules (no Deny)
  • Applies only to instances that reference it
06

Create a Security Group

  • Navigated to VPC > Security groups and selected Create security group.
  • Named it public security group, description "Allow SSH, HTTP, and HTTPS", VPC: test VPC.
  • Added Inbound Rules:
Type Protocol Port Source
SSHTCP220.0.0.0/0
HTTPTCP800.0.0.0/0
HTTPSTCP4430.0.0.0/0
  • Configured Outbound Rule: All traffic to 0.0.0.0/0 (allow all outbound).
  • Created the security group.
07

Launch an EC2 instance and test connectivity

  • Launched a new EC2 instance: Amazon Linux 2, t3.micro.
  • Configured networking: VPC test VPC, Subnet Public Subnet, Auto-assign public IP Enable.
  • Selected the public security group created in Step 06 and key pair vockey.
  • Named it public instance and launched.
  • Connected to the instance via PuTTY following the process from Lab 225.
  • Ran ping -c 4 google.com from the terminal to test internet connectivity.
  • Received successful responses, confirming full end-to-end connectivity through all configured layers.
Verification complete. A successful ping confirms that every networking layer is properly configured: the instance has a public IP, the subnet is associated with a route table that points 0.0.0.0/0 to the IGW, the NACL allows the traffic, and the security group permits outbound connections.

Key Learnings

What Was Learned

How to create and attach an Internet Gateway to a VPC.
How to create a custom route table and add a default route (0.0.0.0/0) pointing to the IGW.
The difference between NACLs (stateless, subnet-level) and Security Groups (stateful, instance-level).
How to configure inbound and outbound rules for both NACLs and Security Groups.
Internet connectivity requires all layers working together: public IP + IGW + route table + NACL + Security Group.

Technical Conclusion

This lab demonstrated the full process of building a VPC networking stack component by component. Unlike the VPC Wizard (used in Lab 263), this manual approach provides complete control over each resource and a deeper understanding of how VPC networking works.

The most important takeaway is that internet connectivity is not a single switch, but the result of multiple layers working in sequence: the instance must have a public IP, the subnet must be associated with a route table that has a route to an Internet Gateway, the NACL must allow the traffic, and the Security Group must permit the specific ports. If any layer is misconfigured, connectivity fails.